Why the Price Tag: Decoding the Cost of Bridges in Violin Making
That pretty piece of wood that supports the strings…they are difficult to replace and clients sometimes ask why they cost so much. “I thought I could just order one for you to send to me,” one client remarked. “Why can’t you?”
The carving of a bridge may not be the first thing luthiers learn, but it is one of the most detailed, fine-tuned work in any violin set up. Precision carving, and an excellent eye working hand in hand with calipers and gauges create the final effect…it is an art long learned and constantly improved during a luthier’s lifespan. Understanding how bridges energize the plates and transmits tone is a critical component of bridge cutting and there is a lifetime of learning behind it.
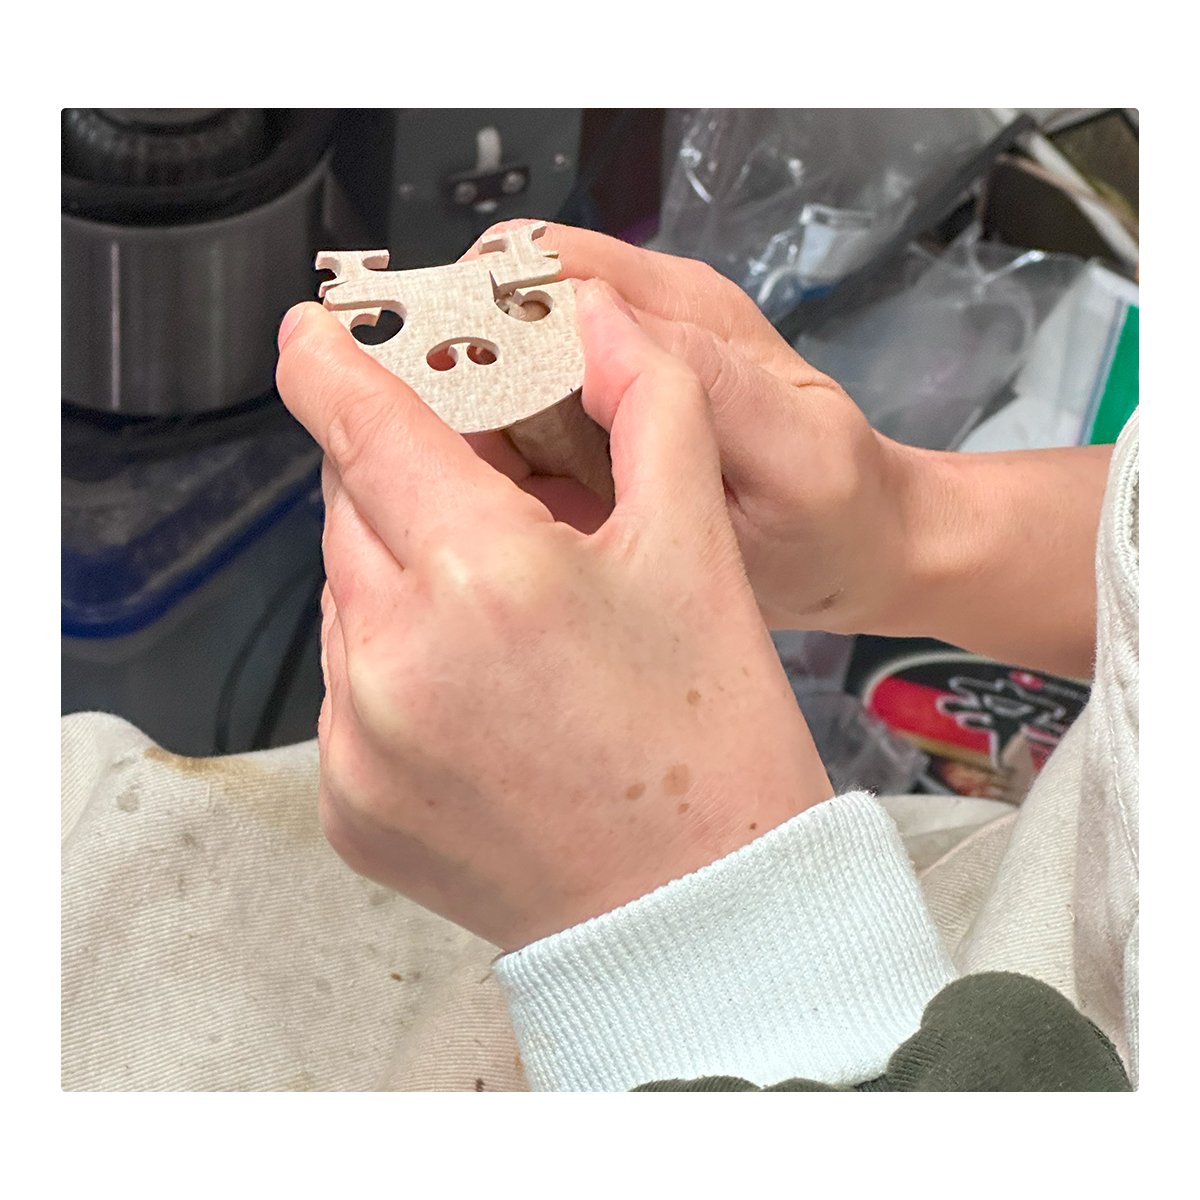
The bridge, like most aspects of the violin, have both a form and a function. The carving starts with a blank: a piece of wood that looks more or less like a bridge, but has lots of extra wood in all directions so that the luthier can carve it down to the exact dimensions the violin requires. At the end of the day, the bridge will be the perfect height, the perfect thickness, and the heart, kidneys, ancles and chamfers opened and carved to create the perfect sound.
Bridge blanks come in many levels of quality from very student-y to master level. Whether denominated by stars (a “3 star bridge”) or trees (one manufacturer of blanks references their bridges as 1 tree, 2 tree etc.) the higher the quality, the more aged and treated the bridge is. The harder the bridge blank, the more resonant the final bridge will be.
Bridges vibrate. The tone of the string’s vibration is carried through the bridge to the topplate so how vibrant the bridge is affects the overall tone of an instrument. A Stradivari violin will sound like rubbish if the bridge is not carved well….while the functional act of holding up the strings is an important role of the bridge, the tonal carve is critical to an instrument sounding as well as it wants to sound.
So a luthier’s job only just begins with the fitting of the bridge. The feet need to fit perfectly on the topplate: any gaps will both reduce the vibrancy of the bridge (and therefore the violin) and will add dangerous pressure to the topplate by not distributing the downward string pressure sufficiently over a necessary area. When the bridge feet are perfect, the top curve is carved to put the exact height of the strings over the fingerboard so the strings are neither buzzy close or hard-to-stop high.
Once it fits, the luthier can start the process of tone-correction. The bridge needs to be thinned adequately…a thinner bridge tends to vibrate more, but a bridge carved too thin will quickly warp or break. The heart of the bridge (the hold in the center, shaped roughly like a heart) is opened along with the kidneys (the two round-ish holes below the bridge). As wood is removed, the instrument can open up tonally. The edges are chamfered, the ancles (notches in the sides of the bridge, just above the feet sitting on the instrument) are also adjusted.
No two bridges are alike and every bridge is carved to the proclivities of its instrument. The process can take several hours. The final step in carving a bridge is to stamp it with the carver’s signature or shop name. It’s a testimony to the high-art of the bridge cutting that we want to sign the work and have our brand reflected in the work quality. We brand all our bridges from our rental stock to our most professional bridge and every bridge demands the highest standard.
Many shops feel that rental and student instruments do not require as professional a bridge as the master violins, but in truth, no luthier should put his or her brand on anything but his/her best work. Sometimes lesser-grade blanks are selected for student instruments, but the time invested in the carve is similar in all the bridges we cut. It’s meticulous work, as most lutherie is, but this invested time manifests itself in the final product: a violin that sings in its finest voice.


